In this article I’m going to show a method for backing up a file that DJI Terra heavily relies on, it uses this file to store all project information and is in effect a single point of failure. The file lives in the DJI Cache and is called Mission.DB.
The reason why this file should be backed up regularly is because if it gets corrupted, you cannot load your projects.
I’ve seen a couple of posts about this file corrupting, and although Terra may be the culprit there are other more likely reasons a file can become corrupted such as a power outage during a write operation, or a disk issue, so to be safe and not sorry, here’s how to protect the file.
The method we’ll use here is a PowerShell script that runs on a schedule in the background, it’ll create backup’s of Mission.DB and call them mission.db.backup.<Serial Number>, e.g. missions.db.backup.1
We’re going to need to create a new file and a new scheduled task, but before we get underway go and find your DJI Cache folder, make a note of the full path as we’ll refer to it in the rest of this article as <DJI Cache Folder>.
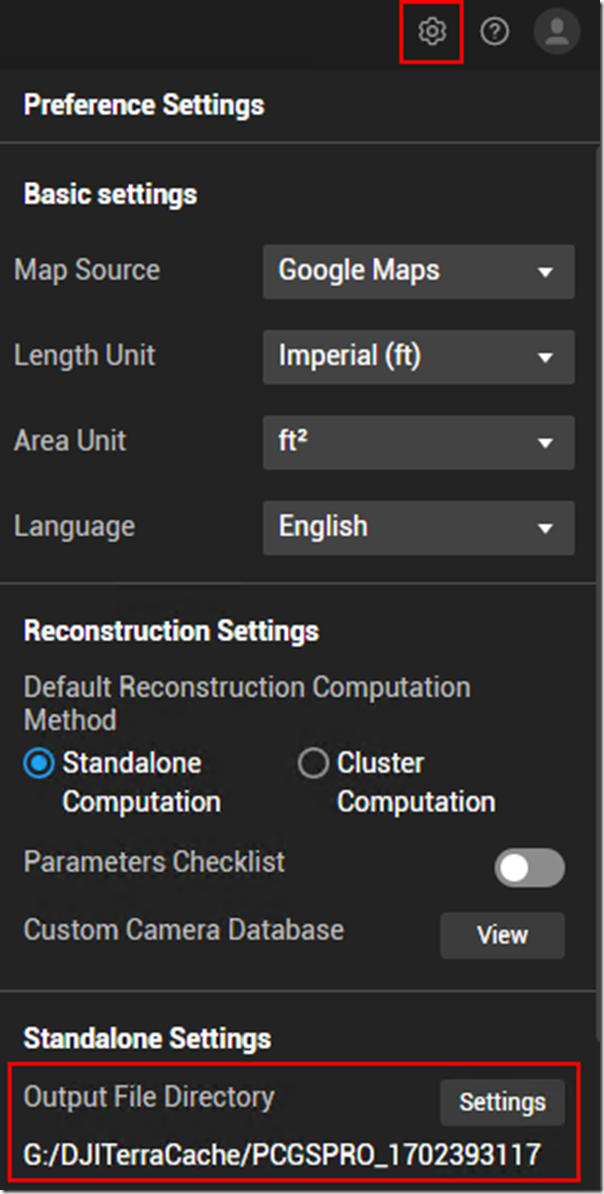
You can find the DJI Cache from within DJI Terra preferences as shown below:
Let’s create that file now, mash that Windows key and type in Notepad and press Enter
When it opens paste in the script from below, and after pasting you must change the DJICacheFolder variable on the first line, make sure it correctly reflects your DJI cache folder:
# Variables to control the script
$DJICacheFolder = “D:\PSTest“
$RemoveFilesOlderThan = “-7”
# Get the last backup sequence number so we can increment it
$currentBackupSerialNumber = Get-ChildItem -Path $DJICacheFolder -Filter mission.db.backup* | Sort-Object CreationTime -Descending | Select-Object -First 1
$nextBackupSerialNumber = $currentBackupSerialNumber.BaseName + “.” + ([int]$currentBackupSerialNumber.Extension.Split(‘.’)[1] + 1)
# Create a backup of the Mission.db file
Write-Host “Next serial = ” + $nextBackupSerialNumber
Copy-Item -Force -Path D:\mission.db -Destination $DJICacheFolder\$nextBackupSerialNumber
# Remove files older than X days old
Get-ChildItem -Path $DJICacheFolder -Filter mission.db.backup.* | Where-Object {($_.LastWriteTime -lt (Get-Date).AddDays($RemoveFilesOlderThan)) } | Remove-Item
I’ve included the script as a screenshot just in case your web browser is changing anything when your copy the script above:
Now save the file to your DJI Cache and call it MissionDBBackup.PS1, before saving change Save as type to All Files (*.*), if you don’t do this the file will be appended with .TXT and things won’t work.
Check that the file is in the DJI cache folder, is correctly named and has the PS1 file extension not .TXT
Now open Microsoft Windows Task Scheduler, you can do this in a variety of ways, pressing the Windows key and typing Task Scheduler should get you there.
Once opened right-click the Task Scheduler Library text and select New Folder
Choose a name for the folder, anything from Custom to your company name
First select the new folder and then right-click and select Create Basic Task
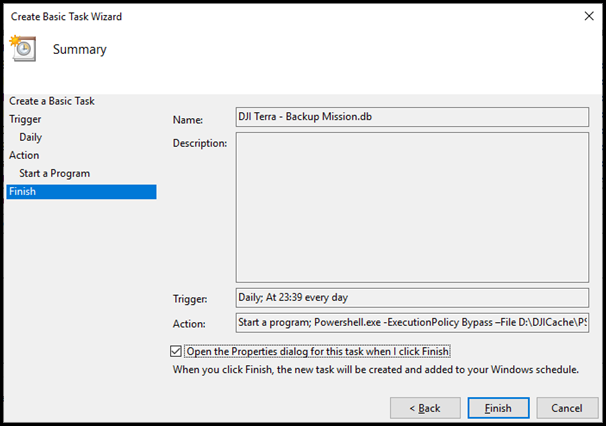
The task needs a descriptive name, I’ve chosen DJI Terra – Backup Mission.db, once entered press Next
Keep the setting as they are, select Next
Same as above, don’t change anything simply select Next
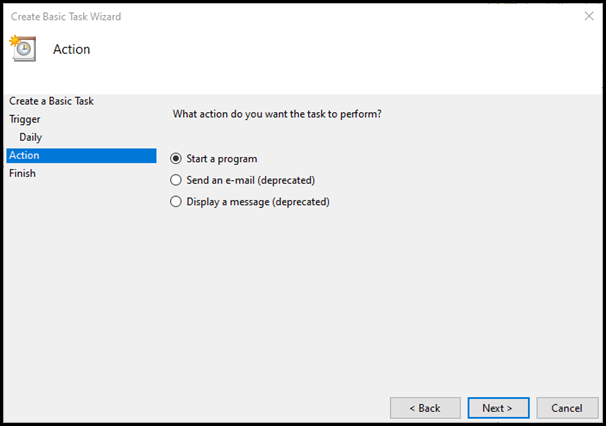
We want to run a program when this scheduled task is told to run, so make sure Start a program is selected and select Next
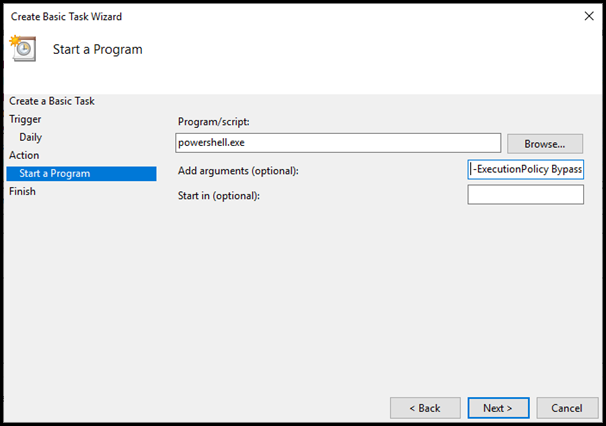
For the Program/script text box enter the following: powershell.exe
For the Add arguments (optional) text box enter the following after replacing the <DJI Cache Folder> references to become the path to your DJI Cache: -ExecutionPolicy Bypass –File <DJI Cache Folder>\MissionDBBackup.PS1, when done select Next
Select that tick box to open the task’s properties and then select Finish
You should see the properties sheet appear showing the General tab, select Run whether user is logged on or not, this stops the PowerShell window appearing for a second when the task runs, select the Triggers tab after you are done
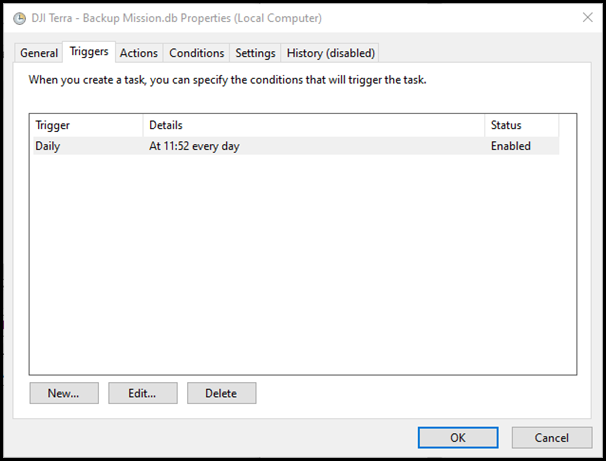
Click that trigger called Daily and select Edit
Now tick Repeat task every and choose 1 hour, or choose however long in-between backups you prefer, you could set this to every 12 hours so at least one backup is made each day if the computer is turned on. Tick Stop task if it runs longer than and set that to 30 minutes. Now select the Conditions tab
Untick Start the task only if the computer is on AC power which will let the backup run if you are using a laptop. Select the Settings tab.
Tick Run task as soon as possible after a scheduled start is missed, this will trigger the backup straight away if you’ve left the computer off for a long time and turn it back on. You can set the other options as shown in the shot below, when done select OK
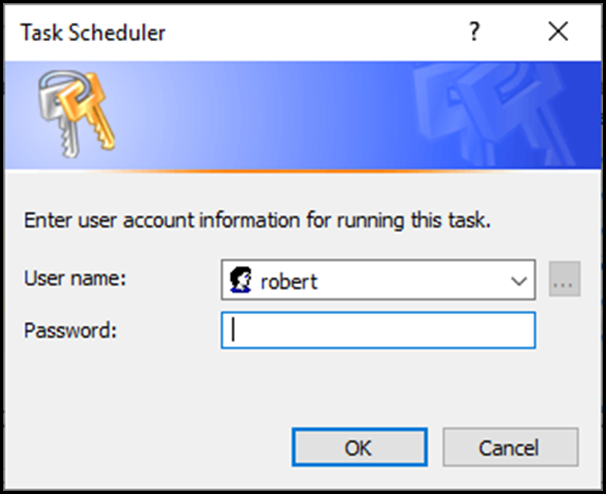
Because we set the task to run as non-interactive\hidden, we need to punch in some credentials for the task to run under, this should be your local account
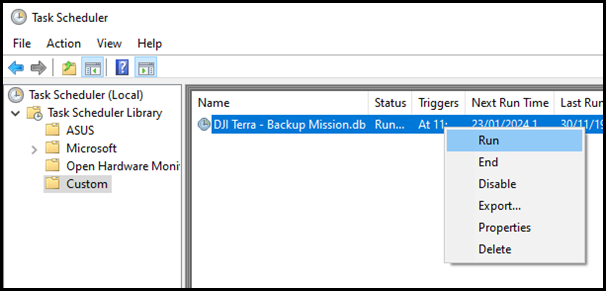
You should see your new Task appear in the folder you created
To check this all works, right click your new task and select Run.
Do you see a new backup file in your DJI Cache folder? If so you’re good to go.
And to recover if mission.db does get corrupted or accidently deleted just make sure Terra is closed, rename mission.db to mission.db.faulty, and get one of the latest backups and rename it to mission.db, start Terra see what gives, replace with older backups until you get a non-corrupted copy of the file.
If it isn’t working things that can go wrong are:
- PowerShell cannot find the script, is it named correctly, is the file extension set to PS1?
- The script or the scheduled task cannot find the DJI Cache folder, do you have the path to your DJI Cache set correctly in the script and task?
- Worth checking that you have not typed something in wrongly somewhere, go back and double check what you entered
